If you are using 3Ccard’s SME or SME Pro Plan, it is important to empower your administrators with precise control of users and roles. You want your admins to have full control in who can access and what kind of actions can be carried out on your 3Ccard Dashboard.
In this article, we will discuss the topic of assigning users and roles within your 3Ccard Dashboard. Discover how to grant access and define permissions for an efficient and centralized management of your digital business card.
What Are Users and Roles
In the context of 3Ccard, users and roles are two important concepts that govern how team members interact with the 3Ccard Dashboard.
Users are the individuals who access and use the 3Ccard Dashboard. Each user will have a unique login credentials to log in the 3Ccard Dashboard. Users can perform various tasks such as creating and editing digital business cards, depending on their roles assigned within the system.
On the other hand, roles are a set of permissions and access rights that are associated with a specific group of users. Roles help to group users based on their responsibilities or access needs. Hence, admins do not need to define permissions for each user individually and repeatedly. Some common roles in Software as a Service (SaaS) include Admin, Manager, and Team Member. Assigning roles ensure team members to perform their tasks efficiently and securely.
Creating Roles
To create new users and assign roles in the 3Ccard Dashboard, you will need to create roles first. Click on the Staff button on the left navigation panel, and choose Roles.
When you use the 3Ccard Dashboard for the first time, there isn’t any role created yet. Hence, it is important for you to define your own set of rules or permission groups, depending on your organization’s needs.
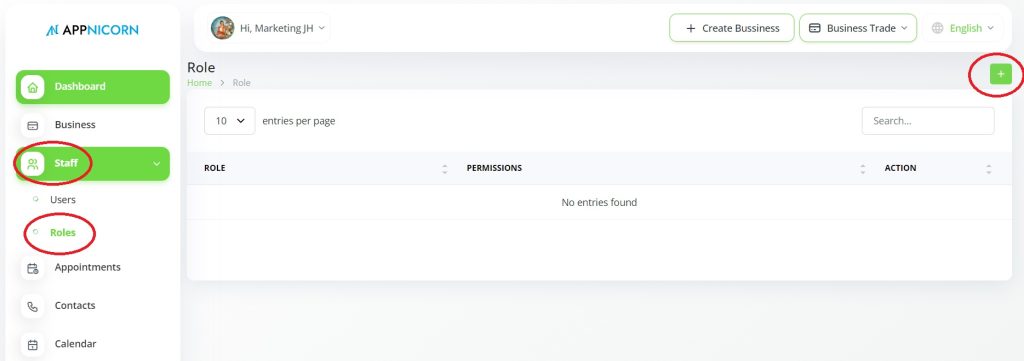
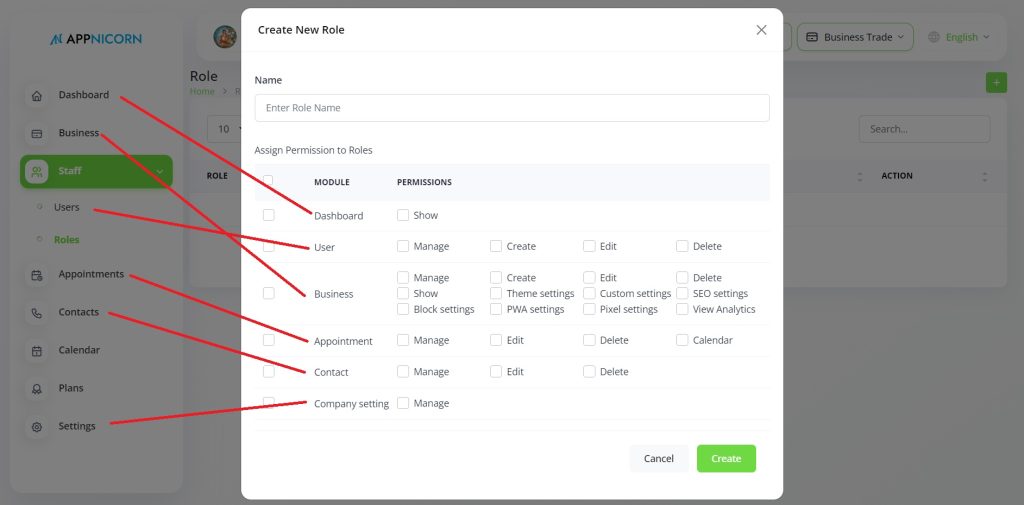
To create new roles, click the + button on the right hand side. A Create New Role window will pop up. At a first glance, it may look complicated but the concept is easier than what you think. Each module refers to its respective feature on the left navigation panel of the 3Ccard Dashboard.
Then, you can assign permissions for each module – whether the role can manage, edit, create or delete. For example, if you assign all three actions (manage, edit, and delete) to the Contact module, the assigned role is capable of managing and editing the inquiry information. The role can even delete an inquiry with ease. Hence, this is the reason why roles are important. You do not want everyone to have the power to delete a valuable inquiry without any supervision.
In our example, we want to create three different roles – Admin, Team Leader, and Team Member.
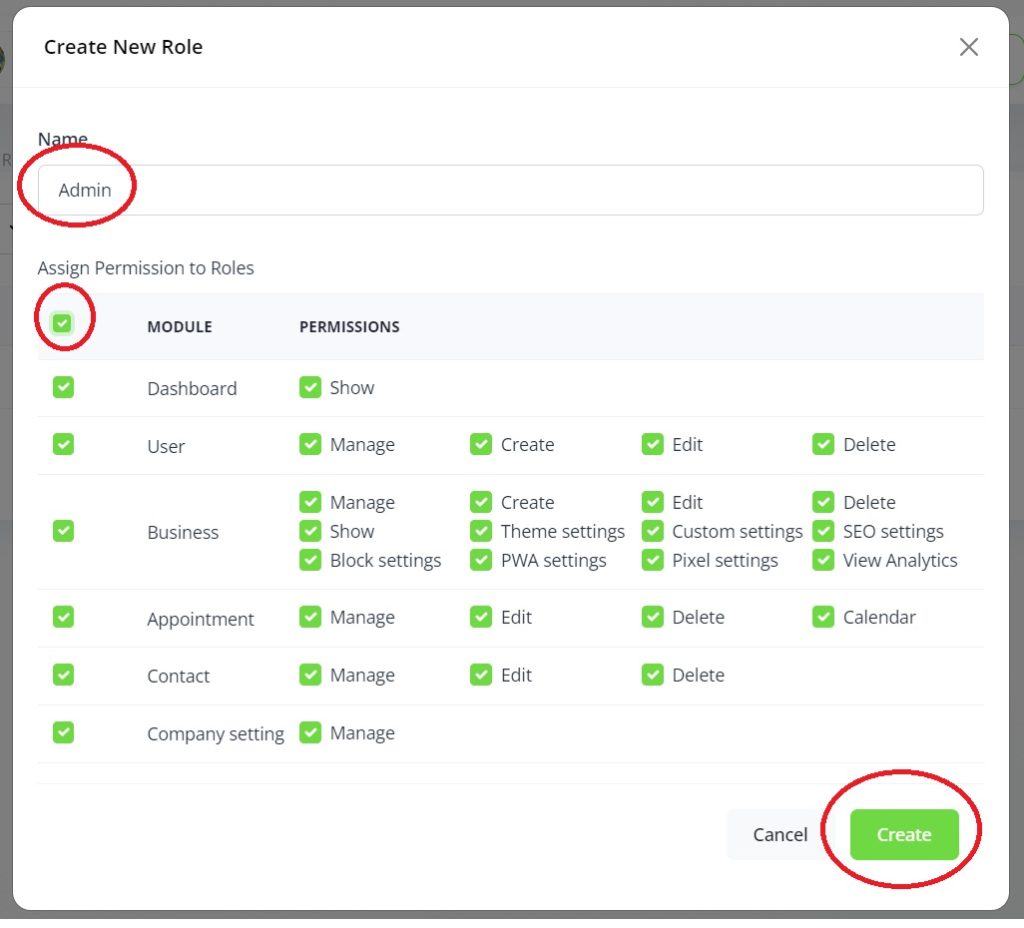
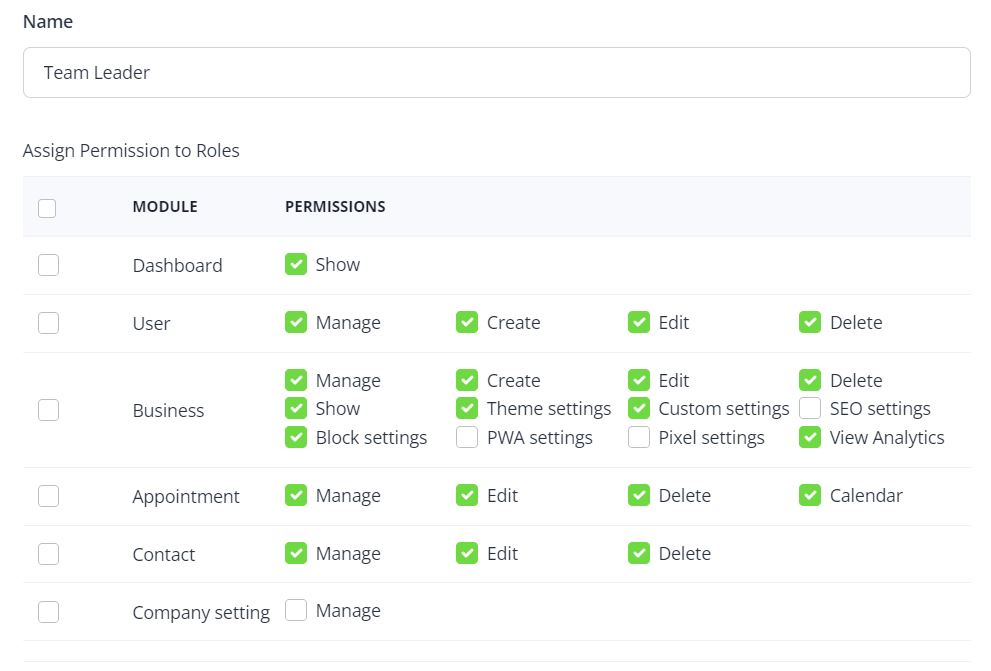
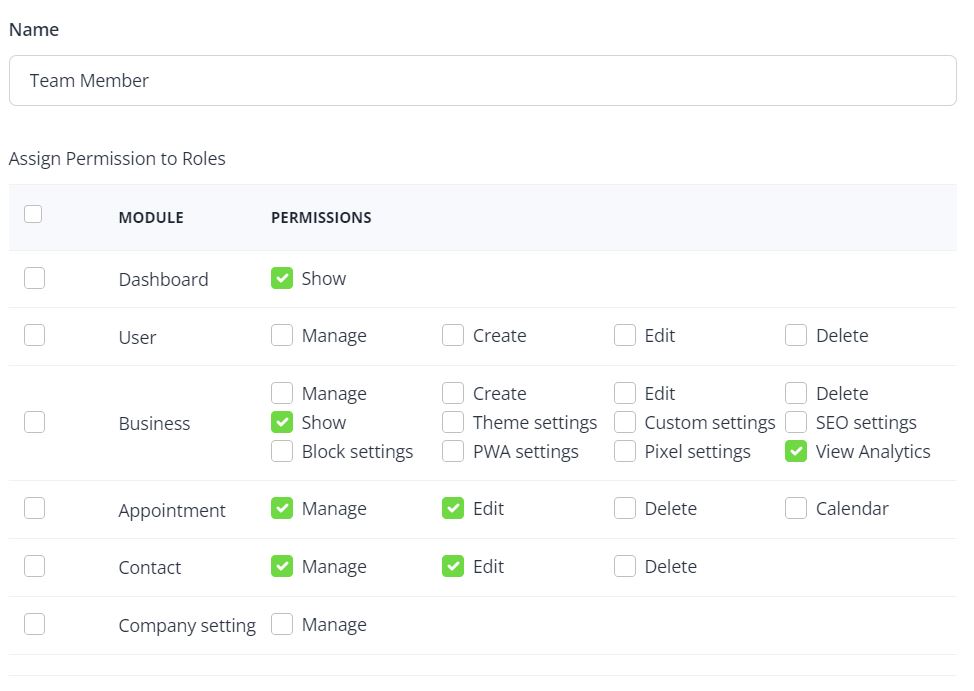
An Admin will always have full access to all features within the dashboard. On the other hand, although access to company setting is restricted, a Team Leader is allowed to create, manage and delete both users and their digital business cards. A Team Member can only view appointments and inquiries.
To create an Admin role, key in “Admin” as the role name. Then, tick the uppermost box to enable all permissions. Remember to click the Create button.
Next, to create a Team Leader role, key in “Team Leader” as the role name. Then, tick the relevant boxes to allow certain permissions. Normally, a team leader or a supervisor role does not need access to Dashboard settings.
Lastly, to create a Team Member role, key in “Team Member” as the role name. Then, only tick the necessary boxes to allow minimal permissions. Normally, a team member only needs to be able to view some basic business information such as appointments and inquiries, so that they can act upon them by contacting the clients or customers later.
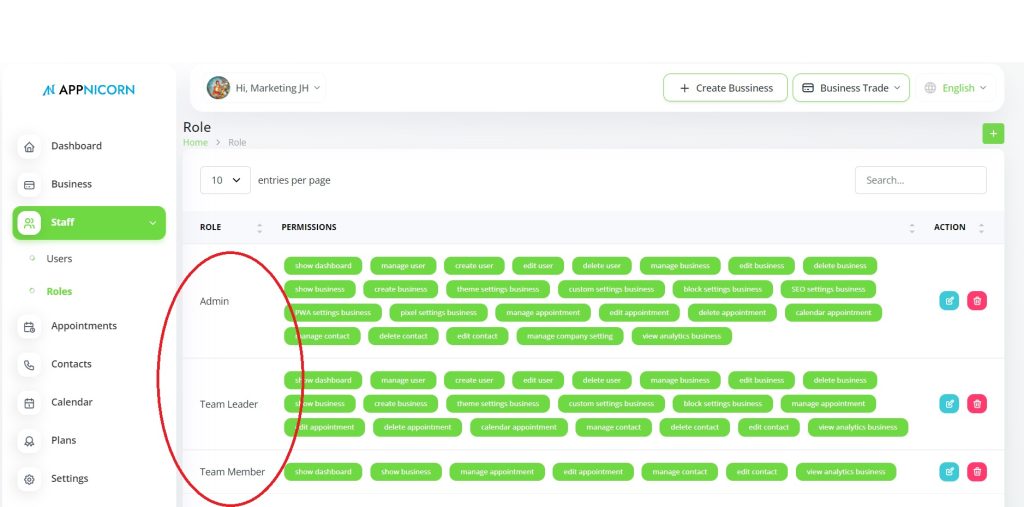
Once all the roles are created and saved, you will find a list of available roles on the page. You can always update or edit the roles if necessary.
Creating Users
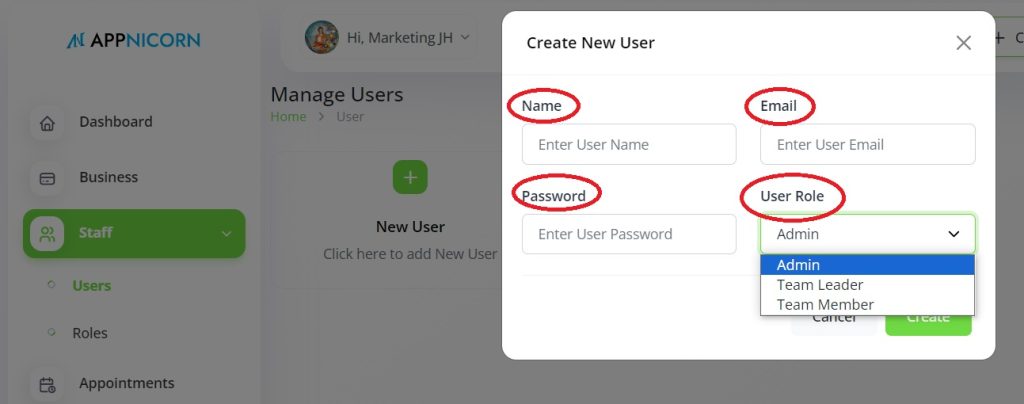
Once you have created necessary roles, you can proceed to create users. Click the Staff button on the left navigation panel, and select Users. Then, click on the New User button to create a new user.
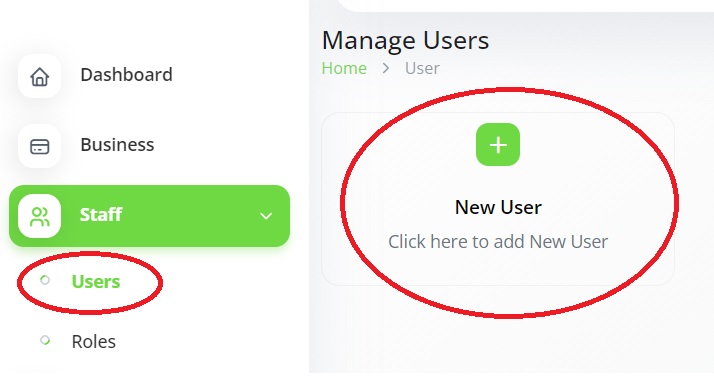
Creating new user is extremely easy. Just provide a name, email address, and a login password. Then, assign a suitable user role. Take note that the email address and the password are needed to log in the 3Ccard Dashboard.
Editing Users
You can always view your created users on the Manage Users page.
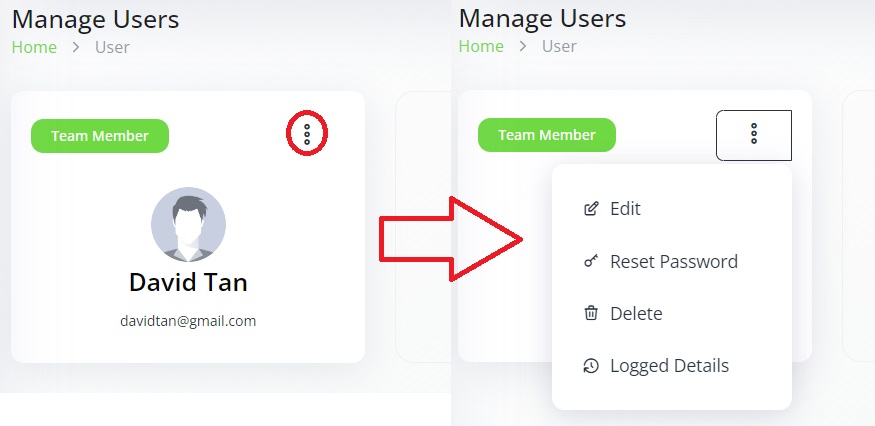
To edit user information, you can click on the “Three-Dot” button. Choose Edit to update the name, role, and email address. On the other hand, choose Reset Password if you want to update the password for a specific user.
If the user has designated, you can also remove the user from your dashboard by clicking on the Delete button.
Lastly, one of the most interesting features of 3Ccard Dashboard is that you can also monitor the logged details of your users. Simply click on the Logged Details button. You will have access to user activity information such as last login time, country, IP, operating system, and device used.
